How do I set random visit durations for my website campaigns?

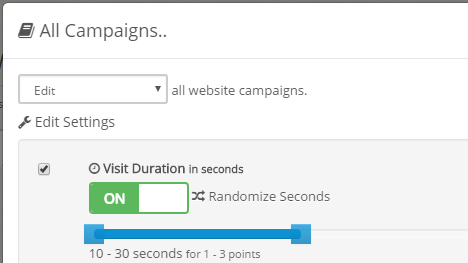
You can now select random visit durations for your website campaigns by toggling ON the Randomize Seconds button within the Visit Duration section and choosing any two values from 10 to 60 seconds.

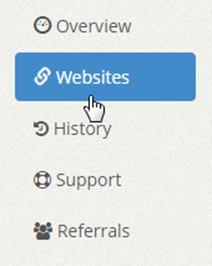
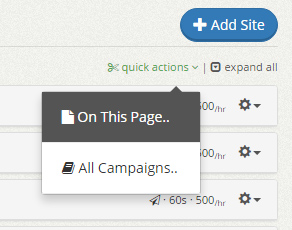
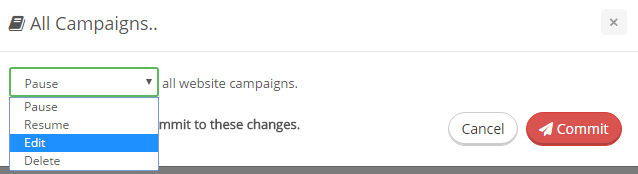
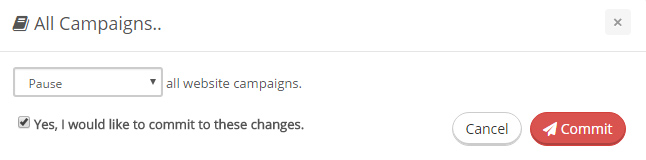
You can also enable this feature within the Quick Actions -> Edit to update all existing website campaigns on a page or on your account.

random visit duration all campaigns

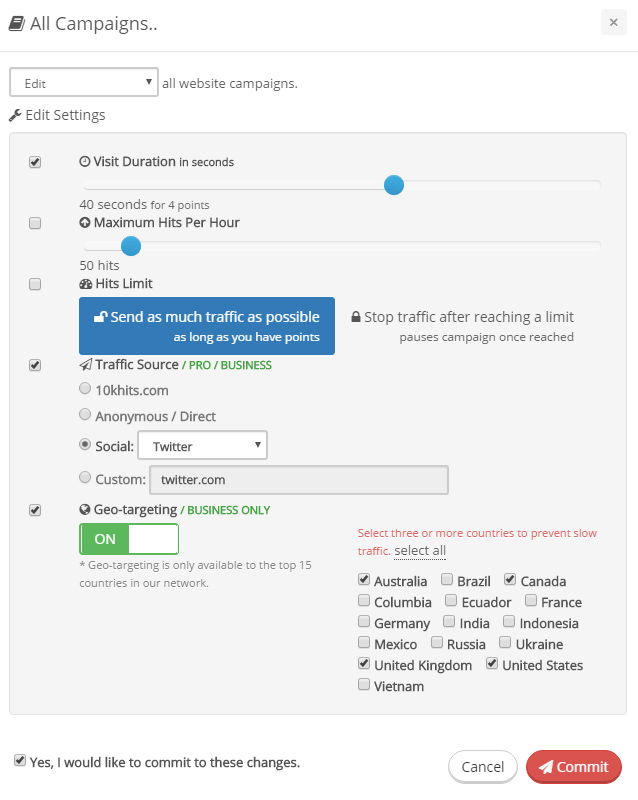
Leave this feature OFF if you only wish to select one visit duration like you had previously.

Simply click and drag the Randomize Seconds button to the right for ON.

random visit duration ON

Use the slider to choose two visit durations you want your campaign to use. For example, if you select 10 – 30 seconds, visitors will randomly stay on your page for 10, 20 or 30 seconds and each visit will consume 1, 2 or 3 points per visit respectively.

visit duration selection


Filed under: DocumentationGetting Started
Tags: , , , , , , , , , , , ,


How do I quickly pause, resume, edit or delete campaigns with Quick Actions?

Click on the “Websites” tab on the left sidebar of the dashboard.

image022

Hover over to the right of the page above your Website Campaigns where you will find a link for “expand all” and “quick actions”. Click on the “quick actions” link to reveal the drop down menu.

Quick Actions Menu

Select “On This Page…” if you wish to pause, resume, edit or delete campaigns that are shown on this page.

Select “All Campaigns…” if you wish to pause, resume, edit or delete all campaigns on your account.

A prompt will show up that will allow you to select your action (Pause, Resume, Edit or Delete) for the campaigns you’ve chosen (On This Page or All Campaigns).

quick actions prompt

After making your selection, you must click on confirm by clicking on “Yes, I would like to commit to these changes” before clicking the red “Commit” button.

quick actions confirm

If you select “Edit”, you will be able to edit the campaigns common settings such as: Visit Duration, Maximum Hits Per Hour, Traffic Source (Pro or Business plans only) and Geo-targeting (Business plans only). IMPORTANT: Make sure you check mark the check box on the left of each setting to update that particular setting. The image below shows an example of editing the Visit Duration, Traffic Source and Geo-targeting of all website campaigns on this user’s account:

quick actions edit

Check mark “Yes, I would like to commit to these changes” and click the red “Commit” button to proceed.


Filed under: DocumentationGetting Started
Tags: , , , , , , , , , , , , , , , , , , , ,


How to Develop a Website That Search Engine Will Find

Develop Website for Search Engine

The internet has become one of people’s primary needs these days. This is a fact that is inevitable. Not only is internet used for fun, a lot of companies are now heavily counting on it for their survival. Besides companies, there are also those who count on the internet solely to earn a living.

Read More →

Filed under: Tips & Tricks
Tags: , , , , , , ,


How it works?

10KHits offers three different plans: Basic (Free), Pro ($10/mo) and Business ($29/mo). If you are a Basic member, you’ll receive your 100 sign up points upon sign up. You’ll also earn 80% of each hit back to your available points balance. If you don’t have the time or resources to surf, you can purchase one of our subscription plans for 50,000 – 200,000 monthly traffic points and receive 120% – 200% of each hit back to your websites depending on your subscription plan.

10KHits is a scalable traffic exchange that lets you decide how long you want your visitors to stay on your website from 10 seconds (1 point per hit) to 60 seconds (6 points per hit). Each point is equivalent to a 10 second visit.

To start earning points and receiving hits, you’ll need to download and run our recommended program called10KHits Exchanger. You can also surf directly from our website (not recommended).

Filed under: DocumentationGetting Started
Tags: , , , , , , , , , , , , , , , , , , , , ,


How do I add sites to my account?

To add sites to your account and start receiving hits to them, click on the “Websites” tab on the left sidebar of the dashboard.
image013

To add a site, you can click on the blue “+Add Site” button on the top right or bottom right corner of the page. If you are a new member, you will also see a dashed/dotted slot that you can click to add your first site to our network.
image226

Input the URL of the website or webpage you want to promote.
image228

Choose the visit duration for your hits from 10 seconds to 60 seconds using the slider.
image230

Set the maximum hits per hour using the slider from 5 hits to 500 hits per hour.
image233

Set a hits limit for your campaign. Hits limit is the life time hits of your campaign. If you select “stop traffic after reaching a limit” the campaign will pause once the limit is reached.
image234

If you are using a Pro or Business account, you can set a social, custom source URL or anonymous / direct traffic as your traffic source.
image201

If you are using a Business account, you can limit your hits from the following countries using geo-targeting. Check mark the countries you want to receive traffic from and toggle the geo-targeting option from OFF to ON
image199

If your website contains nudity, violence, pornography or profanity, you must set the content screening to “The content on this page is not safe for work.” If your website is safe for work select “The content on this page is safe for work.”
image197
image236

Click “Add Site” and your campaign for that URL will start running instantly as long as you have points in your account.

Filed under: DocumentationGetting Started
Tags: , , , , , , , , , , , , ,


How do I expand/collapse all of my website campaign panels?

At the top right of the Websites page right below the +Add Site button, you’ll see a link called “expand all”. Click that link to expand all panels for your website campaigns. To collapse all the website campaign panels, click the “collapse all” link.
image213image216

Filed under: DocumentationGetting Started
Tags: , , , , , , , , , , , , , ,


What is hits limit?

Hits limit is a useful setting to allocate how many hits you want a certain website to receive in its lifetime. This is a good feature for traffic resellers or people who own multiple websites and webpages. There are two options available: send as much traffic as possible or stop traffic after reaching limit.
image210

The first option is basically uncapping your campaign. You’ll receive as many hits for that URL as long as you have points. Once you run out of points, you will stop receiving hits.
image211

The second option lets you allocate a hit limit to that website in its lifetime. This is good setting for accounts that have multiple URLs. For example, if you have 3 different website campaigns running and you just purchased 100,000 points, you can set one website campaign to receive a 5,000 hit limit at 60 seconds visit duration (30,000 points), another with 15,000 hit limit at 20 second visit duration (30,000 points) and your last campaign can have a 40,000 hit limit at 10 second visit duration (40,000 points). Keep in mind that each hit will cost you 1 – 6 points each depending on your visit duration settings. You can always manage/edit your campaign settings if you need to change the hit limit.

Filed under: DocumentationGetting Started
Tags: , , , , , , , , , , , ,


Introduction to the website campaign panel

image195
When you expand a website campaign panel, you’ll see 8 different boxes including a line graph at the bottom. Starting from the top left:
1. Site URL – the page that will receive hits from this campaign.
2. Status – the status of the campaign (active, paused, suspended or expired).
3. Traffic Source – hiding/masking where your hits are coming from.
4. Geo-targeting – whether geo-targeting is enabled or not. If enabled, it will list which countries the campaign is targeting.
5. Visit Duration – lists the duration of each hit from 10 to 60 seconds per hit.
6. Maximum Hits Per Hour – shows how many hits are remaining for the hour. For example, 75 of 500 remaining is the same thing as having received 475 hits out of the 500 maximum. There are still 75 hits remaining for you in the hour. Making changes to this setting will only take effect in the next hour. For instance, if you had 500 as your max but you change it to 300 after receiving 25 hits, it show up as 475 of 300 remaining. You will still use up a max of 475 hits this hour until the next hour begins and the setting is updated to 300.
7. Hits Limit – Displays whether you have a hits limit enabled on your campaign. If enabled, it will show the number of hits you’ve set for the lifetime of this campaign. Once that number is reached, the campaign will pause automatically.
8. Safe for Work? – displays whether the page is safe for work or not. Pages that are not safe for work are ones that contain pornography, nudity or profanity.
The line graph shows how many hits the website has received in the past 7 days for this campaign. There is also the number of hits today and hits total for the website campaign at the top right of the line graph in green and blue. You can zoom in for a more detailed graph by clicking and dragging your mouse. Click the reset zoom button to zoom out again.

Filed under: DocumentationGetting Started
Tags: , , , , , , , , , , , , , , , , , , , , ,