Organic search traffic feature is here!

Organic search traffic

Organic Search feature is now available on 10KHits. Business plan users can now send organic traffic to their websites as long as their websites are already indexed on Google.

To use the Organic option, you must have a Business plan. For a limited time, you can upgrade to Business plan here: https://www.10khits.com/pricing with promo code: JUL200 for an additional 200,000 traffic points for FREE!

Organic traffic will show up in web analytic tools as Organic medium with google as the source. Keywords are not available with this feature and will show up as (not provided).

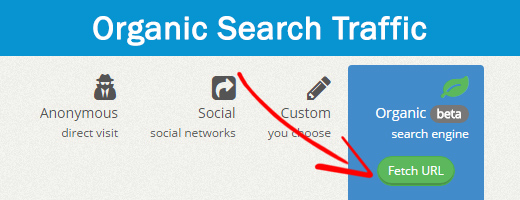
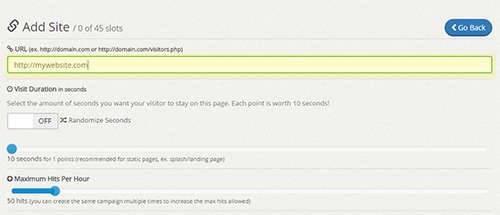
When you add your website, paste the link that you wish to promote in the URL and scroll down the page to the traffic source to select Organic.

add site

Click the “Fetch URL” button to see if your link is indexed by Google or not.

Fetch URL

If your site is found on Google, there will be a “Success!” status below it. You are all done!

Configure the rest of your campaign settings and add the site to run it. Here is a rundown of the different statuses you may see:

  1. Success! – You can use this link with Organic traffic option.
  2. Not indexed – Your website is not indexed by Google according to our system. Click the “Manual Fetch” button to learn how to double check in case our system missed it.
  3. Not found – Your website does not exist. Make sure your website is online and open to the public.
  4. Error – You did not paste the correct long indirection link. You can retry and follow the directions in the popup.

Disclaimer: The Organic traffic feature is currently in beta. Please report any issues you experience via support ticket.

Filed under: Tips & Tricks
Tags: , , , , , , , , ,


What are the key advantages for using 10KHits?

Besides all the wonderful things we mentioned before like visit duration, we also offer scalability and features such as maximum hits per hour, white label traffic and geo-location.

Maximum hits per hour lets you decide on a maximum limit for the amount of hits you want to receive per hour for your campaigns. Whether you want to use up your points quickly or slowly, you can choose from 5 hits to 500 hits per hour.

If you are a traffic reseller, you may want to upgrade to our Pro or Business plan as it includes white label traffic. White label traffic allows you to mask where your traffic comes from. For example, instead of showing the hits you received as 10KHits (default setting), you can customize the source so that it shows up as your company/business name or make it show up as anonymous/direct traffic in Google Analytics.

With the business plan, you’ll be able to select the geo-location for your traffic. You can set up your campaigns to receive traffic from countries where it is most abundant on our network such as United States, France, Vietnam, Indonesia and Vietnam.

Another key advantage that all plans have is booster packs. You can scale any plan to whatever size you want by buying extra website slots that will lasts 30 days or add extra traffic points to your account each month. Whether you need an additional 40 website slots on your free account or 10,000,000 traffic points on your Pro account, all your needs can be fulfilled with 10KHits booster packs.

Filed under: DocumentationGetting Started
Tags: , , , , , , , , , , , , , , , , ,


How do I add sites to my account?

To add sites to your account and start receiving hits to them, click on the “Websites” tab on the left sidebar of the dashboard.
image013

To add a site, you can click on the blue “+Add Site” button on the top right or bottom right corner of the page. If you are a new member, you will also see a dashed/dotted slot that you can click to add your first site to our network.
image226

Input the URL of the website or webpage you want to promote.
image228

Choose the visit duration for your hits from 10 seconds to 60 seconds using the slider.
image230

Set the maximum hits per hour using the slider from 5 hits to 500 hits per hour.
image233

Set a hits limit for your campaign. Hits limit is the life time hits of your campaign. If you select “stop traffic after reaching a limit” the campaign will pause once the limit is reached.
image234

If you are using a Pro or Business account, you can set a social, custom source URL or anonymous / direct traffic as your traffic source.
image201

If you are using a Business account, you can limit your hits from the following countries using geo-targeting. Check mark the countries you want to receive traffic from and toggle the geo-targeting option from OFF to ON
image199

If your website contains nudity, violence, pornography or profanity, you must set the content screening to “The content on this page is not safe for work.” If your website is safe for work select “The content on this page is safe for work.”
image197
image236

Click “Add Site” and your campaign for that URL will start running instantly as long as you have points in your account.

Filed under: DocumentationGetting Started
Tags: , , , , , , , , , , , , ,


What is traffic source?

image201
Traffic source (white-label) is a setting you can use to brand your hits or mask them. There are 4 options available for you if you have a Pro or Business account. By default, hits will show up as coming from 10Khits.com on web traffic tools such as Google Analytics. With a Pro or Business account, you have 3 additional options: Anonymous / Direct, Social or Custom.
image203

Anonymous / Direct will show your hits coming from the direct source. This is similar to if you typed the URL of your website in your browser and pressed enter.
image205

The social option lets you mask your hits from some of the top social media sites like Facebook, Twitter, Google+ and Tumblr. We will add to the list regularly so keep checking for more social sites!
image208

The custom source option is a way you can brand your hits with any name or URL you like. You can set it to anything you like as long as there are no special characters in it. With custom source, the hits will show up as what you’ve set in the custom box. In this example, the hits will display as coming from “mywebsite.com”.

Filed under: DocumentationGetting Started
Tags: , , , , ,


Introduction to the website campaign panel

image195
When you expand a website campaign panel, you’ll see 8 different boxes including a line graph at the bottom. Starting from the top left:
1. Site URL – the page that will receive hits from this campaign.
2. Status – the status of the campaign (active, paused, suspended or expired).
3. Traffic Source – hiding/masking where your hits are coming from.
4. Geo-targeting – whether geo-targeting is enabled or not. If enabled, it will list which countries the campaign is targeting.
5. Visit Duration – lists the duration of each hit from 10 to 60 seconds per hit.
6. Maximum Hits Per Hour – shows how many hits are remaining for the hour. For example, 75 of 500 remaining is the same thing as having received 475 hits out of the 500 maximum. There are still 75 hits remaining for you in the hour. Making changes to this setting will only take effect in the next hour. For instance, if you had 500 as your max but you change it to 300 after receiving 25 hits, it show up as 475 of 300 remaining. You will still use up a max of 475 hits this hour until the next hour begins and the setting is updated to 300.
7. Hits Limit – Displays whether you have a hits limit enabled on your campaign. If enabled, it will show the number of hits you’ve set for the lifetime of this campaign. Once that number is reached, the campaign will pause automatically.
8. Safe for Work? – displays whether the page is safe for work or not. Pages that are not safe for work are ones that contain pornography, nudity or profanity.
The line graph shows how many hits the website has received in the past 7 days for this campaign. There is also the number of hits today and hits total for the website campaign at the top right of the line graph in green and blue. You can zoom in for a more detailed graph by clicking and dragging your mouse. Click the reset zoom button to zoom out again.

Filed under: DocumentationGetting Started
Tags: , , , , , , , , , , , , , , , , , , , , ,