You should always link your Google Analytics with Adwords to track where your visitors are clicking, how much time they are on your site, how many conversions you get, which page makes your users leave your website the most, etc. There is an option to do that in Adwords, so don’t forget about linking your Adwords to your Analytics. It is very important to analyze how well your campaigns are working so you can make adjustments to it. You’ll have to use auto-tagging which allows you to import Adwords data into Analytics automatically. You can also manually tag but we recommend auto-tagging for additional details you wouldn’t get from manually tagging. Auto-tagging will allow you to see what happens after a user has clicked your ads. When you enable auto-tagging, a parameter called gclid will be added to your landing page URL like this: www.domain.com/?gclid=548abc.
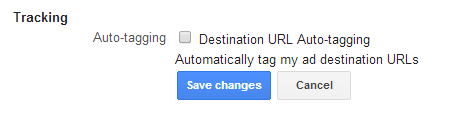
To enable auto-tagging in Adwords, go to the gears icon and select Account settings. In the preferences tab, you’ll find a Tracking section. Click Edit and checkmark Destination URL Auto-tagging and Save changes.
Auto-tagging will provide you with these detailed reporting in Google Analytics:
• Campaign
• Source
• Medium
• Content (creative)
• Keyword
• Query Match Type
• Ad Group
• Destination URL
• Ad Format
• Ad Distribution Network
• Placement Domain
• AdWords Customer ID (in case you have multiple accounts for your company)
• Hour of Day
• Placements
• Keyword Positions
If you don’t link your Analytics with Adwords and don’t use auto-tagging, you’ll get (not set) as the # of visitors that came from your campaigns. This does not help you because you’re getting clicks but you don’t know what happens after the click. This makes it impossible to measure your goals.