A List of PPC Tips That Work
10 years ago
If you are one of those many people out there trying to offer your products and/or services on the interweb, then there are plenty of advertising options you can choose from. Among these many options, one that has often proven to be quite effective is the pay-per-click – often known as PPC as well – advertising option. With this kind of advertisement, you can see high sales conversion that you may have never expected before. However, in order to make your PPC advertising work, you need to follow a number of tips described below.
Filed under: Tips & Tricks
Tags: 10khits, advertising, pay per click, ppc, PPC advertising, tips
Exchange Network Congestion
10 years ago
We are noticing some congestion with our Exchange Network. Please be patient while we investigate the issue.
Incident History
- 5:30 PM – Solved. Technicians will continue to monitor network.
- 12:00 PM – Network congestion subsided. Setting up mitigation techniques for abuse.
- 10:00 AM – Exchange Network crashed. Rebooted and investigating issue.
- 5:13 AM – Mitigating user abuse with Exchange Network.
- 4:10 PM – Investigating issue with server.
- 4:00 AM – Exchange Network congestion discovered.
Filed under: Tips & Tricks
What is SEO?
10 years ago
Search Engine Optimization is the process of increasing your visibility naturally or organically (unpaid) for the keywords you want your webpages to rank for on search engines.
There are different ways to do SEO. Some tactics are considered black hat SEO (“the shady way of doing SEO”) and the standard way is called white hat SEO. SEO is not considered spam. Matt Cutts, the head of the web spam team at Google said, “No. We don’t consider SEO to be spam.” Watch the video below for more information:
SEO is not a quick process. If you are looking to rank for a highly competitive keyword such as “shoes”, you must be aware that you are going up against multi-million/billion dollar companies in the shoes industry who are already investing hundreds of thousands of dollars every month to rank on the first page. Although SEO may seem intimidating to small businesses, it is not incredibly difficult to rank up for long tail keywords which are less competitive such as “shoes in Boston” or “cheap red tennis shoes”. Rather than spending a great amount of money to try to rank up your website for a highly competitive keyword that might bring in 100,000 visitors per month, you can spend it smarter on PPC campaigns, paid search, or long tail keywords that will bring in the same or more amount of visitors for a lot less (250 long tail keywords x 400 visitors = 100,000 visitors per month).
Filed under: Documentation→Search Engine Optimization
Tags: search engine optimization, seo, what is seo
Organic search vs. Paid search
10 years ago
Organic search are search results that are listed on search engines because of its relevancy to the search term. Paid search are ad listings on search engines that show up on search terms advertisers wish to target. On Google, paid search is listed at the top and on the right side of the search.
About 70% of Google searches will go organic search results and the remaining 30% of searches will go towards paid search results.
Ranking up for organic search is very important because the top 5 results are the websites that will receive the most clicks. About 60% of all clicks go to the first 3 results and 75% of all clicks go to the top 5 results. If you are on the bottom of the page or on the second page, the click through rate will be so low that you’re pretty much non-existent for that search term.
Filed under: Documentation→Search Engine Optimization
Tags: organic search, paid search, search engine optimization, seo
What is on-page optimization?
10 years ago
On-page optimization involves editing things on your page so that search engine spiders can read your site and index them properly. There are many factors that have an effect on your webpage ranking such as title tags, meta description, heading tags, image alt tags, content, URL structure and internal linking. It is important to have unique content on every page and to avoid having duplicate content or keyword stuffing. An ideal optimized webpage will include keyword in title, keyword in URL, keyword in image alt tag and the keyword listed 1-3 times in the body copy.
Filed under: Documentation→Search Engine Optimization
Tags: on-page optimization, on-page seo, search engine optimization, seo
How do I keyword research?
10 years ago
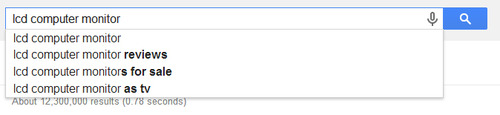
Keyword research is one of the most important steps for SEO. It is the first step for planning your SEO strategy. You can plan your keywords using the Adwords Keyword Planner from Google found here: https://adwords.google.com/KeywordPlanner
It is good to focus on long tail keywords and synonyms when planning the keywords you want to rank up for. To search for synonyms, you can type in “synonym
You should only go for the keywords with the best KEI (Keyword Effectiveness Index). This means go for low competitive keywords that are the easiest to rank up for that have the most searches. Don’t go for highly competitive keywords that are the most difficult to rank up for even if it has a really high search volume. Remember that the ultimate goal here is to get the most organic traffic out of your SEO campaign and the best way of doing that is to rank up for numerous long tail keywords.
Filed under: Documentation→Search Engine Optimization
Tags: keyword research, search engine optimization, seo
What is keyword mapping?
10 years ago
Keyword mapping is deciding on which page on your website will be used for each target keyword so that you can optimize the pages for those target keywords and start link building. It is best practice that you group similar keywords together and build one page for each niche rather than building a new page for every keyword you have. A keyword niche is a group of keywords that all contain the same keyword such as – funny desktop wallpapers, cartoon desktop wallpapers, beautiful desktop wallpapers, blue desktop wallpapers, etc. Keyword mapping can be done in spreadsheet software such as Microsoft Excel.
You should also add the URL structure you plan on using for each group. Going back to the desktop wallpapers example, you might want to use the URL structure: /desktop-wallpapers/ for that niche.
Filed under: Documentation→Search Engine Optimization
Tags: keyword mapping, search engine optimization, seo, url structure
How can I optimize my title tags?
10 years ago
Title tags are the most important element for on-page optimization. Title tags changes the page title in your browser which is something search engine spiders look at to determine what the page is about. The keyword should be as close to the front of the title tag as possible. For example, if you want to rank for the keyword “Pink elephants”, you may want to have a title like this: “Pink elephants at the zoo” or “First pink elephant to be born”. Title tags should not exceed 65 characters and should be unique for every page on your website.
Filed under: Documentation→Search Engine Optimization
Tags: on-page optimization, search engine optimization, seo, title tags
How do I optimize my meta descriptions?
10 years ago
Meta descriptions do not help with ranking your website on search engines but can help with increasing the click through rate. Meta descriptions are placed within the head tag and should not exceed 165 characters. Meta descriptions do not show up on your page and are only used to show up on search engines. Google may sometimes replace your description with a snippet of text from your page so you should not spend too much time on this.
Filed under: Documentation→Search Engine Optimization
Tags: meta description, on-page optimization, search engine optimization, seo
Which tools should I use for SEO?
10 years ago
There are numerous tools you can get for free. Some free tools we recommend are: Traffic Travis, Google Analytics, Google Webmaster Tools (A MUST HAVE!), Google Trends, Link Diagnosis, WordPress SEO plugin by Yoast and more.
Some paid tools we recommend are: Wordtracker (great for long tail keywords with best KEI), Moz, Open Site Explorer and Ahrefs.
Filed under: Documentation→Search Engine Optimization
Tags: search engine optimization, seo, seo tools